If you are into business, you might know the importance of sleep and hibernate mode. By default, Windows 10 goes into sleep mode after about 15 minutes of inactivity, but it still uses your power.
Have you ever thought about scheduling the startup and shutdown time of Windows 10 in advance? In this way, you don’t need to worry about extra power consumption or manually shut down your PC.
Also Read: How to Enable & Add Hibernate to the Start Menu in Windows 11
Schedule a Shutdown in Windows 10 PC
Hence in this article, we will show you the best method to schedule an automatic shutdown and startup on Windows 10 operating system.
The process is a bit complicated, so follow it carefully. Let’s check out.
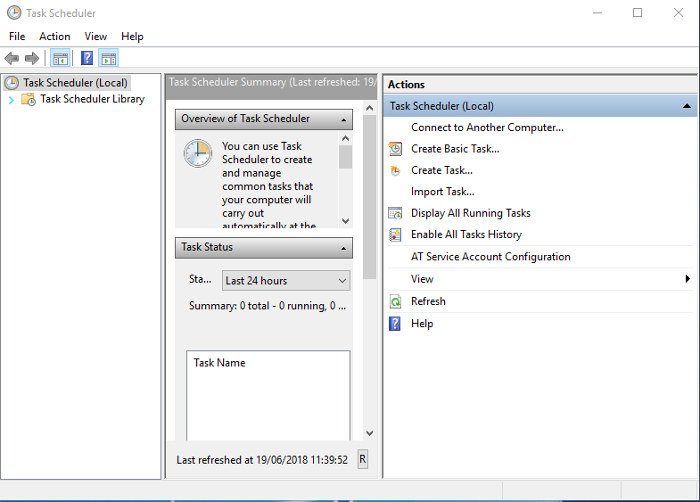
1. First of all, head to the Control Panel > Administrator Tools > Task Scheduler.
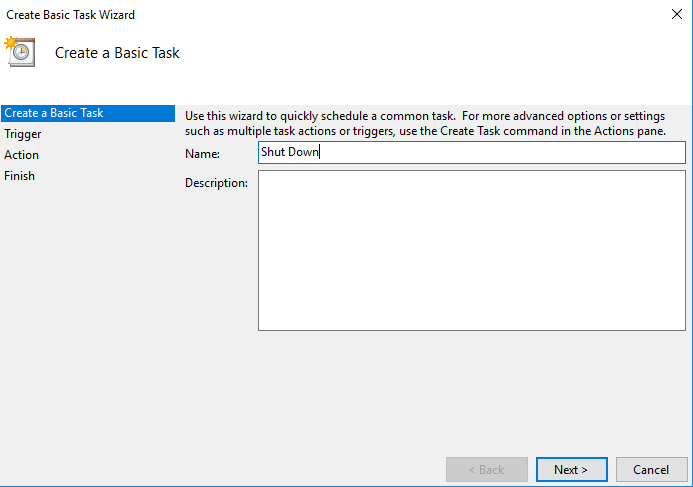
2. Under the Task Scheduler option, click on ‘Create Basic Task’ and name it something like ‘Shutdown.’
3. After naming the new task, click on the Next button.
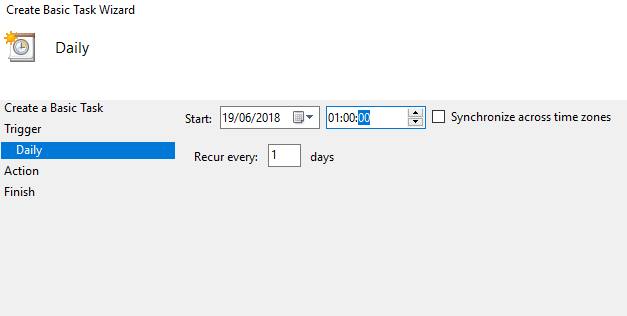
4. In the next step, select ‘Trigger‘ and then click on ‘Daily‘. Now, you need to enter the time and date you want your computer to shut down.
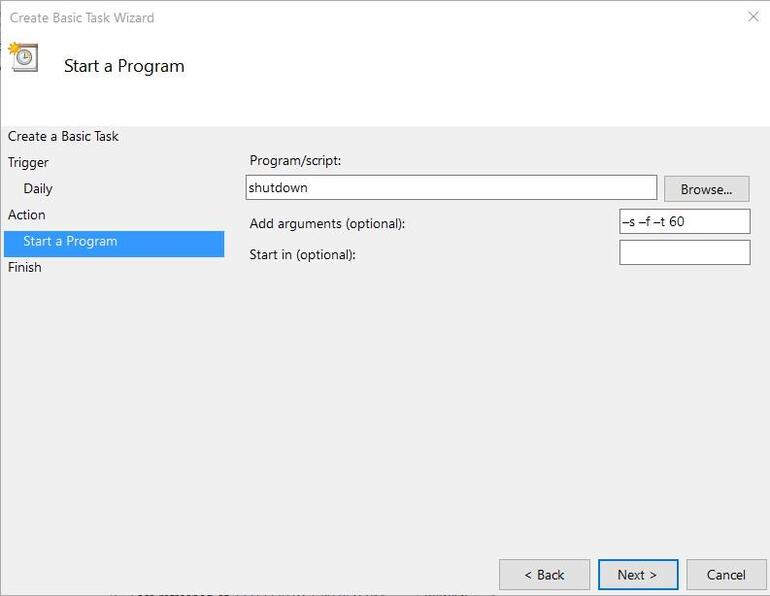
5. Click on ‘Next’ and then select Start a Program. Now under the ‘Program/Script’ enter ‘Shutdown‘. On the ‘Add Arguments’ box, enter -s -f -t 60
Important: The ’60’ in the script represents the seconds you have until the countdown ends. If you want to make it an immediate shutdown, change that argument to t-0
That’s it! You are done. This is how you can schedule Windows 10 shutdown.
So, this guide is all about how to schedule a Windows 10 shutdown. I hope this article helped you! Please share it with your friends also. If you have any doubts related to this, let us know in the comment box below.


