Technology around is evolving at a rapid pace. We have just entered the era of Artificial intelligence, and the segment has to see many improvements yet. In this digital age, keeping our personal information secure has become more important than ever.
No devices and operating systems are secure these days; it doesn’t matter how hard you try to protect your data, hackers will still find a way to gain access to your personal information.
However, if you have an iPhone, you have many choices to safeguard your personal information from unauthorized access. For example, you can lock your iPhone with a passcode, Face ID, or Touch ID.
Also read: 10 Best AI Apps for iPhone
How to Lock or Unlock Notes on iPhone
Similarly, if you often save sensitive information on the Apple Notes app, you can also password-protect it. You can lock notes on your iPhone in easy steps, and you can do it to boost your privacy and prevent authorized access.
In this article, we will discuss how to set up a password for your iPhone Notes. The steps will be very easy; just make sure to follow the steps as mentioned.
Things to Do Before:
Before you start, you need to ensure a few things. Here are the things you must remember before you lock the Apple Notes.
- Update your iPhone to the latest version of iOS.
- Turn on Notes in your iCloud Settings.
- Notes synced from third-party services can’t be locked.
- The Notes can’t be locked if you’re signed in to iCloud with a Managed Apple ID.
How to Lock Notes on iPhone
If you have followed everything we mentioned, you can lock your notes on your iPhone. Here’s how to lock notes on iPhone.
1. Open the Notes app on your iPhone.
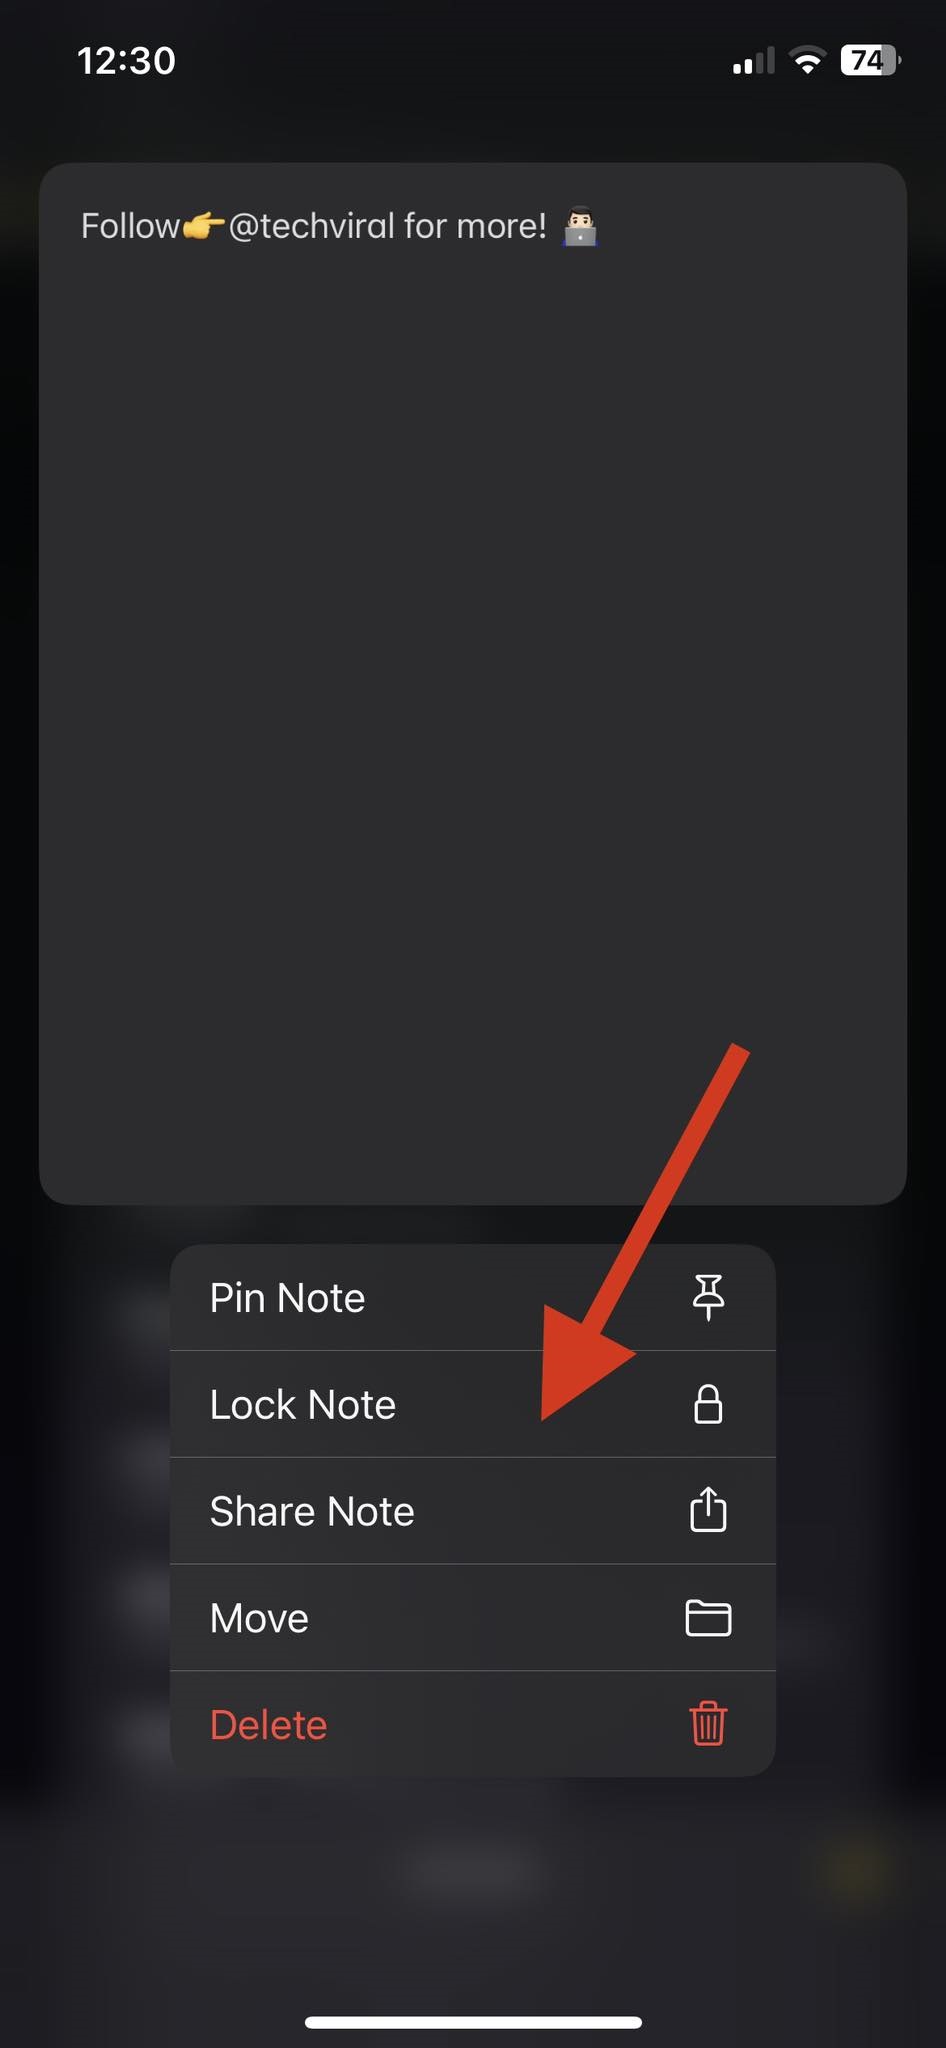
2. Select the Notes you want to lock and tap on the More button.
3. Follow the prompt and select the Lock Note option.
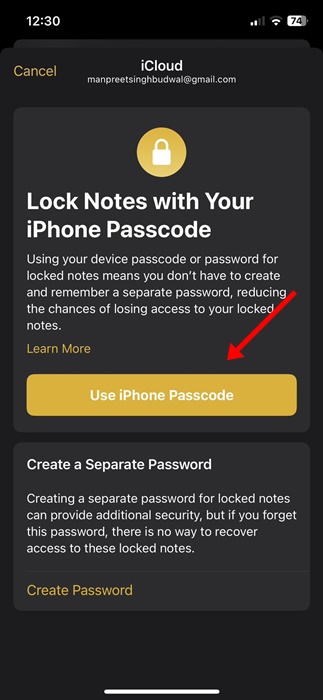
4. If your iPhone already has a Passcord, you can lock notes with your iPhone Passcode. Tap on the Use iPhone Passcode option.
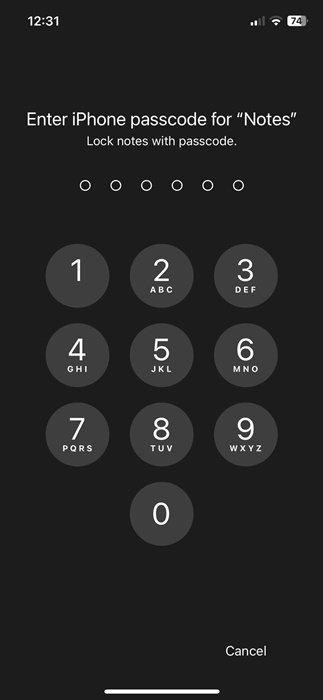
5. Now, enter the iPhone passcode for notes.
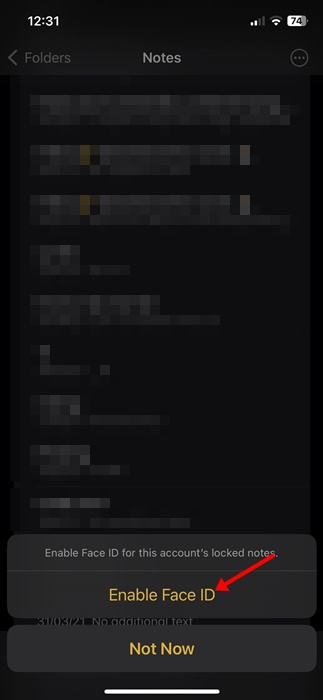
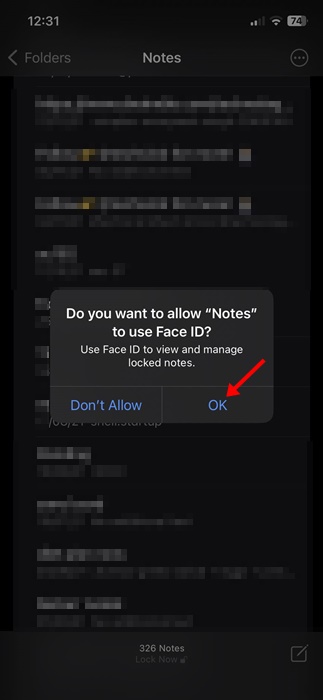
6. To enable Face ID for the locked notes, tap the Enable Face ID option.
7. On Do You want to allow ‘Notes’ to use Face ID? Prompt, tap on the Ok button.
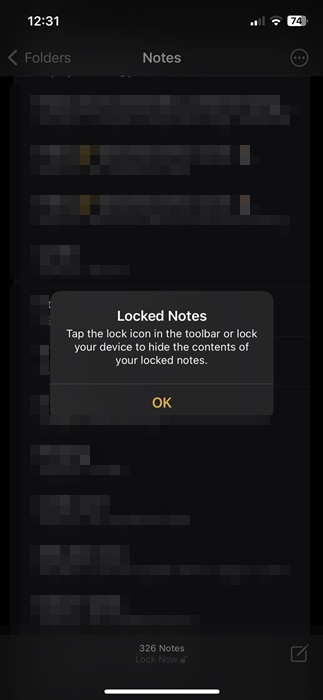
8. The note will be locked on your iPhone.
That’s it! This is how you can lock notes on your iPhone in easy steps.
How to Open a Locked Note?
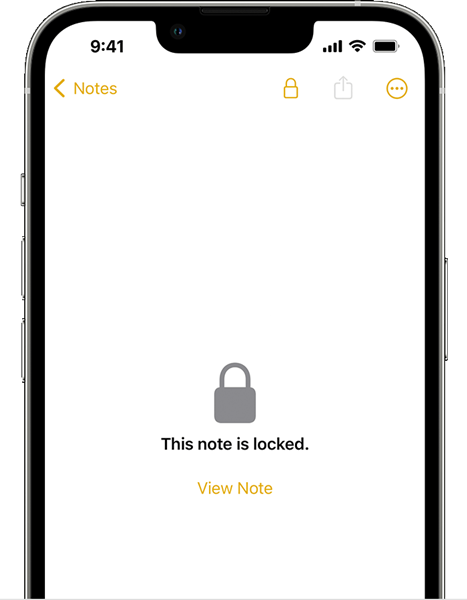
Once you lock a note on your iPhone, you must use your Face ID, Touch ID, or enter your password to open it. Here’s how to open a Locked note on iPhone.
- Tap on the Locked Note.
- On the This note is locked screen, tap on the View Note.
- Now use Face ID or Touch ID, or enter your passcode.
That’s it! This will view you the note. Your locked notes will stay open only for several minutes. After that, you will have to go through the authorization process again.
How to Remove a Lock from Notes?
If you plan to unlock a note on your iPhone, follow these steps instead. Here’s how to remove a lock from Apple Notes.
- Open the locked Notes and tap View Note.
- Enter your passcode/password or use FaceID/Touch ID.
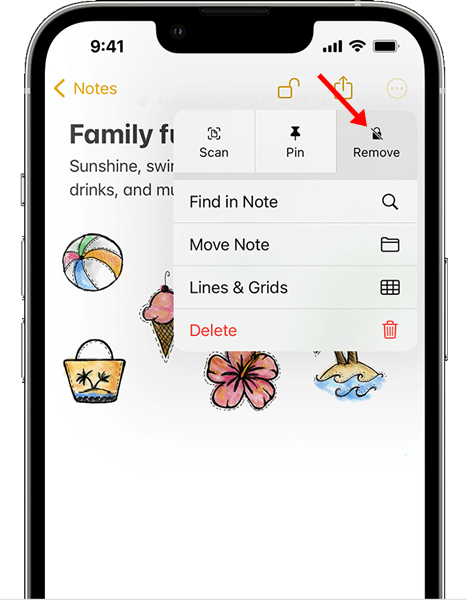
- Now tap on the More button at the top right.
- On the menu that appears, select Remove.
That’s it! This will remove a lock from the note. When you remove a lock from a note, the lock is removed from all devices signed in with the same Apple ID.
How to Reset Notes Password on iPhone
If you have forgotten your Notes Password, you cannot regain access to your locked notes. However, you can create a new note password or use your device passcode instead.
But doing so won’t grant you access to your old locked notes. When you open a locked note and enter the wrong password, you will receive an alert stating that the password is wrong, along with a hind for your old password.
You can follow that hint to access your locked notes or enter the correct old password you may remember. If you enter the correct old password, you can update that note’s password to your current one.
So, this guide is all about how to lock notes on iPhone. You can follow this method and secure notes with your personal data – such as financial details, medical information, or website logins. Also, you get various ways to lock notes on your iPhone, like with a password, Face ID, or Touch ID.

