If you are a Windows 11 user, you may know how crucial it is to keep the device drivers up to date. The operating system is still new and has many issues with stability. At times, Windows 11 can show you driver releated errors or even BSOD.
However, the good thing about the Windows operating system is that the built-in tool can fix most of its problems. For example, if you are experiencing problems like distorted sound or audio lagging, you can use the built-in tools to update your Audio drivers.
Keeping the audio driver up to date has several benefits; it ensures quality audio output and rules out every other issue with the audio playback. Hence, this article will discuss how to update audio drivers in Windows 11.
How to Update Audio Drivers in Windows 11
There is not one but multiple ways to update the audio drivers on Windows 11; you can use either the Device Manager, Windows 11 Settings, etc. Below, we have shared all of them. Let’s check out how to update audio drivers in Windows 11.
1. Update Audio Drivers from Windows 11 Update
The easiest & hassle free way to install all pending driver updates on Windows 11 is by updating the operating system. Windows 11 automatically downloads & installs all missing drivers during the System Update. Hence, you must update your Windows 11 to the latest version.
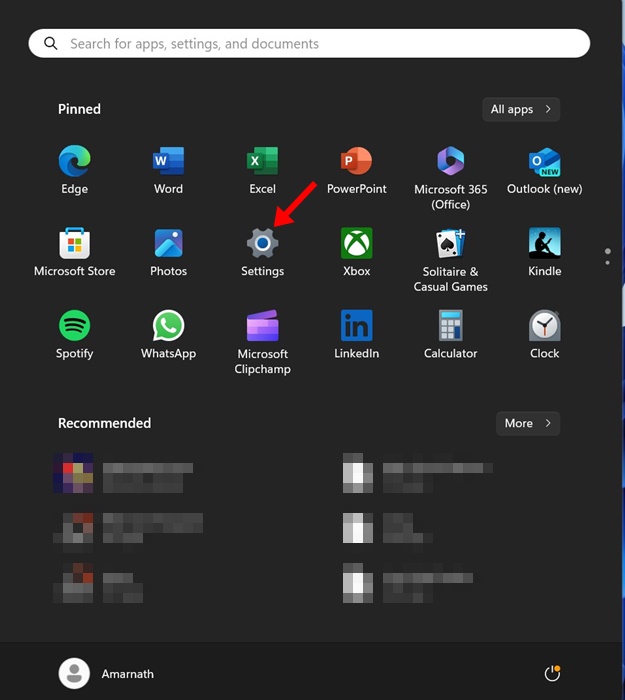
1. Press the Windows Key + S button on your keyboard. This will open the Settings app.
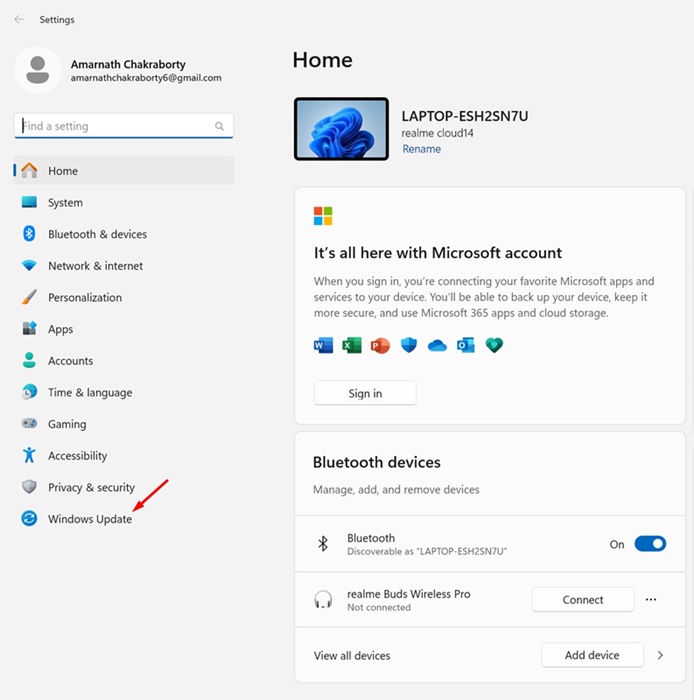
2. When the Settings app opens, switch to the Windows Update tab.
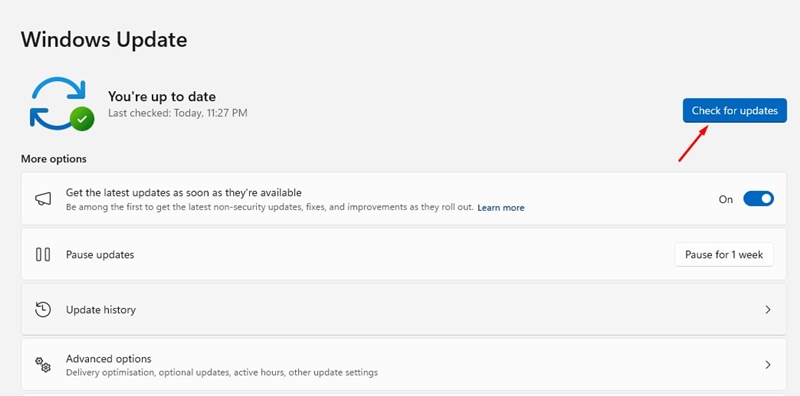
3. On the right side, click the Check for Updates button.
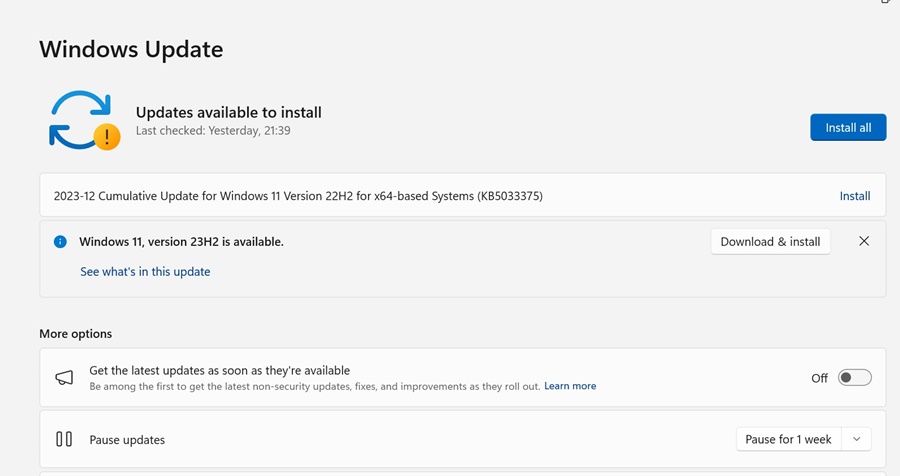
4. Now, Windows 11 will automatically check for software updates. If any update is pending, click on the Download and Install button.
5. Now, wait until the update downloads & installs on your device.
That’s it! This is how you can update audio drivers in Windows 11 via System Updates.
2. Update Audio Driver on Windows 11 via Device Manager
In this method, we will use the Device Manager utility of Windows 11 to update the outdated audio drivers. Here’s how to update Windows Audio Driver using Device Manager.
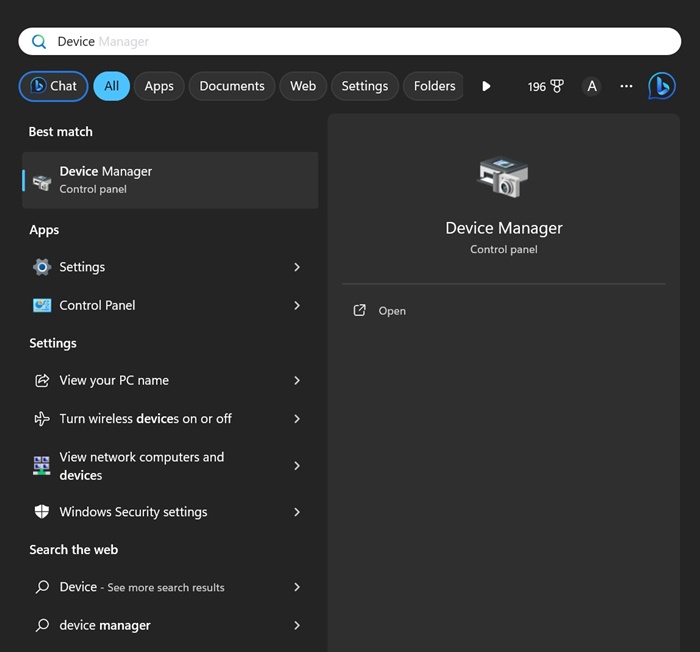
1. Type in Device Manager on the Windows 11 Search. Next, open the Device Manager app from the list of best match results.
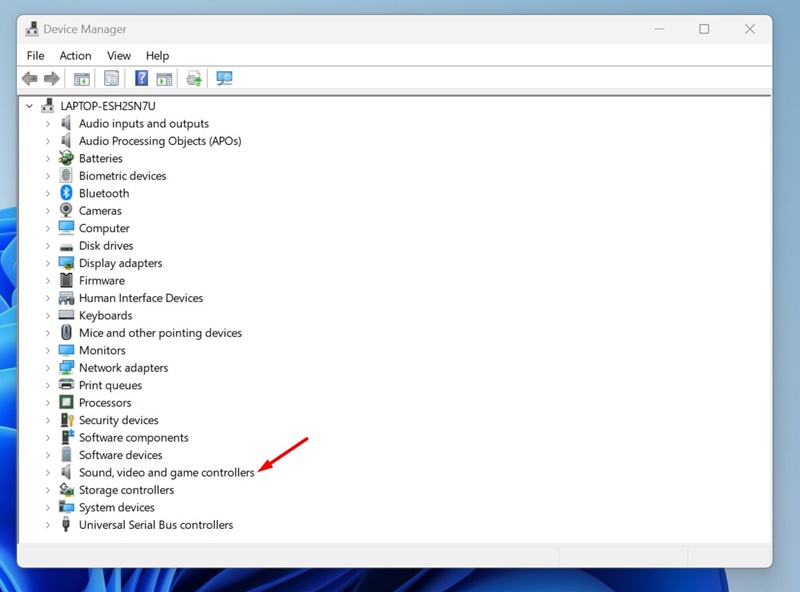
2. When the Device Manager opens, expand the Sound, Video, and game controllers.
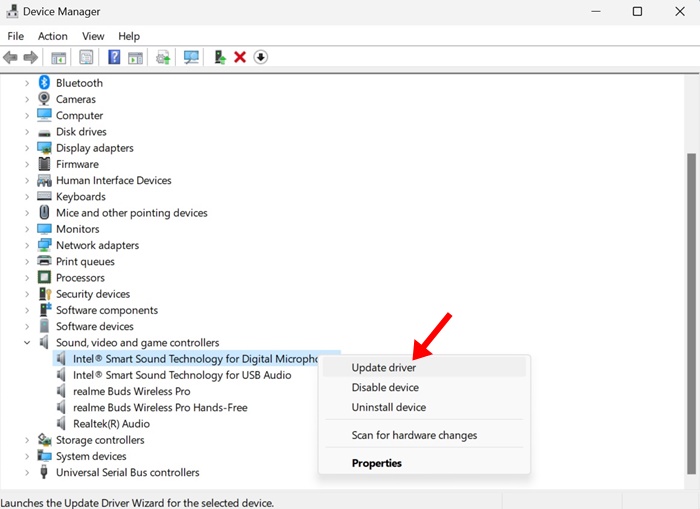
3. Now, right-click on the audio card and select Update Driver.
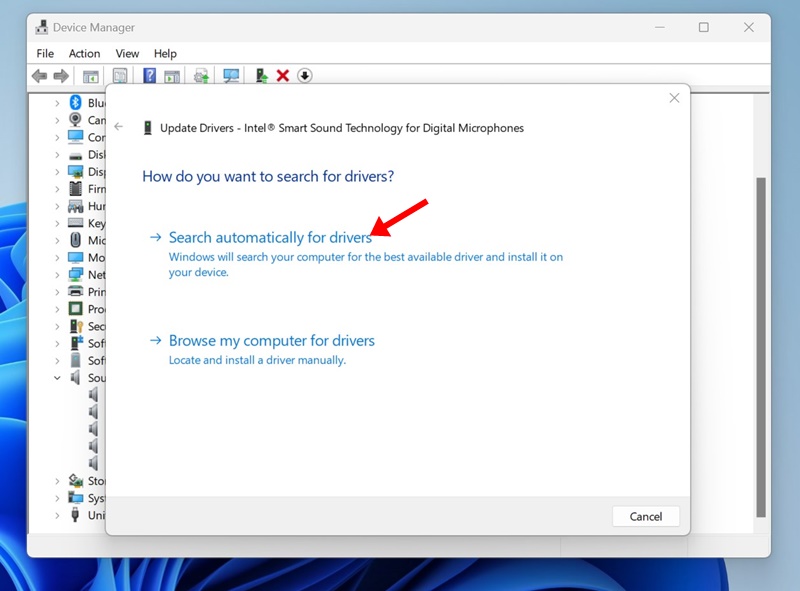
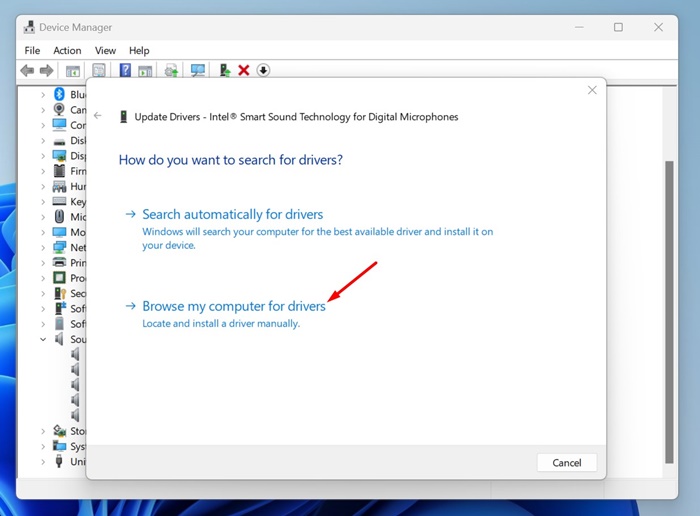
4. On the Update Drivers prompt, click on Search automatically for the drivers option.
5. If you already have the latest audio drivers select the Browse my computer for drivers option and locate the driver.
That’s it! This is how you can update audio drivers in Windows 11 via Device Manager.
3. Download the latest Audio Driver from the Manufacturer’s Website
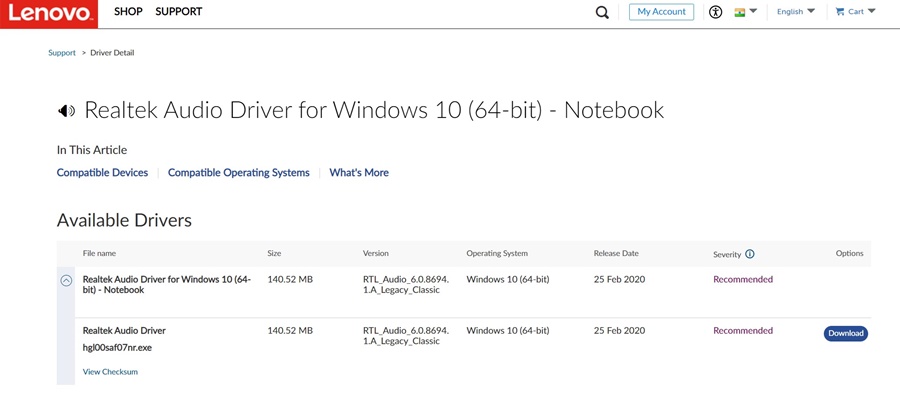
If you’re using a laptop or computer from a specific OEM, you can visit their official website to download the latest audio drivers for the sound card.
For example, if you have a Lenovo laptop, you can visit Lenovo’s official website and download the latest audio drivers.
Usually, you will have to visit the official website of your laptop/PC manufacturer and find their driver repository. Once you find the repository for device drivers, download the latest audio drivers & install them on your computer/laptop.
Below, we have listed some popular OEMs associated with manufacturing computers & providing device drivers.
4. Update Audio Drivers using Driver Updaters
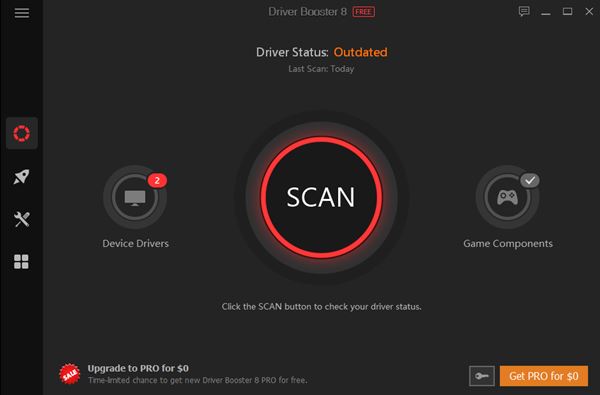
Hundreds of driver updater programs are available for Windows 11; some are good and can update all outdated drivers in just a few clicks.
Most of the driver updaters designed for Windows 10 are also fully compatible with Windows 11. On Techviral, we have already shared a list of the best driver update tools for Windows; make sure to go through that guide and pick the tool that suits your needs.
So, this guide is about updating Audio Drivers in Windows 11 computers. We have shared different ways to update audio drivers in Windows 11; you can follow any of them. Let us know if you need more help in updating audio drivers in Windows 11.
