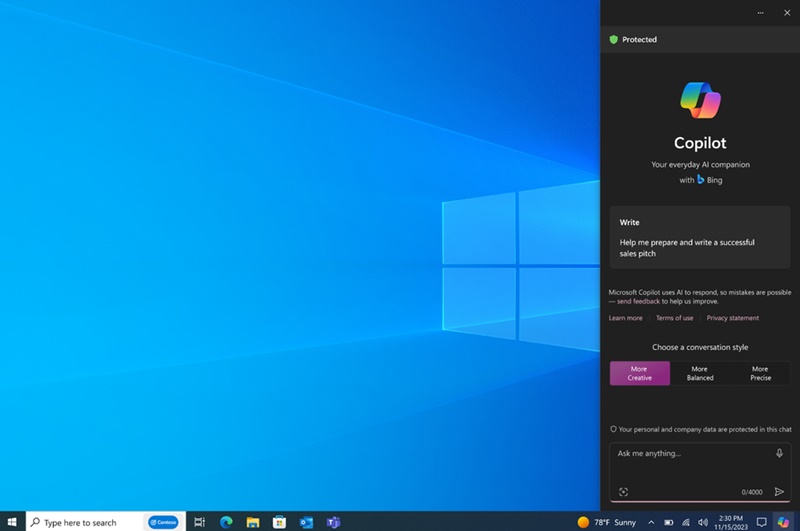
If you are a Windows 11 user, you may know about the Windows Copilot. Windows Copilot is basically an AI Assistant that is designed to run on the Windows 11 operating system.
While the AI assistant was originally introduced for Windows 11, it’s not available for Windows 10 as well. If we talk about the functionality of Copilot, the AI assistant for Windows shares many similarities with Cortana.
The only advantage that Copilot has over Cortana is that it can take help of AI to do even more complex things. For example, it can interact with your text inputs, control the features & settings of your PC, generate images for you, etc.
After receiving lots of positive feedback from the users, Microsoft has now rolled out Copilot in Windows (in preview) for Windows 10, version 22H2 to Windows Insiders in the Release Preview Channel. So, if you are a Windows 10 user and want to experience the Windows Copilot, continue reading the guide.
Copilot on Windows 10
Copilot is already enabled by default in Windows 11, version 23H2. However, if you are a Windows 10 user and want to try Copilot, you need to install Windows 10 version 22H2 right now.
You can get Windows 10, version 22H2 by joining the Release Preview Channel through the Windows Insider Programme. Once you have the required version of Windows 10, you can readily use the Windows Copilot AI Assistant.
How to Enable Copilot in Windows 10?
Enabling Copilot on Windows 10 could be a difficult task, especially if you aren’t an Windows Insider. However, you can follow these steps to enable Copilot on your Windows 10 computer.
1. Make sure that your computer is running on Windows 10 Build 19045.3754 or newer. If you want to get this build, you need to join the Windows Insider Program and select the Release Preview channel for update.
You can follow our guide – How to Join Windows Insider Program to join the Release Preview Channel.
2. Once you join the Release Preview Channel, download & install Windows 10 Build 19045.3754 or greater.
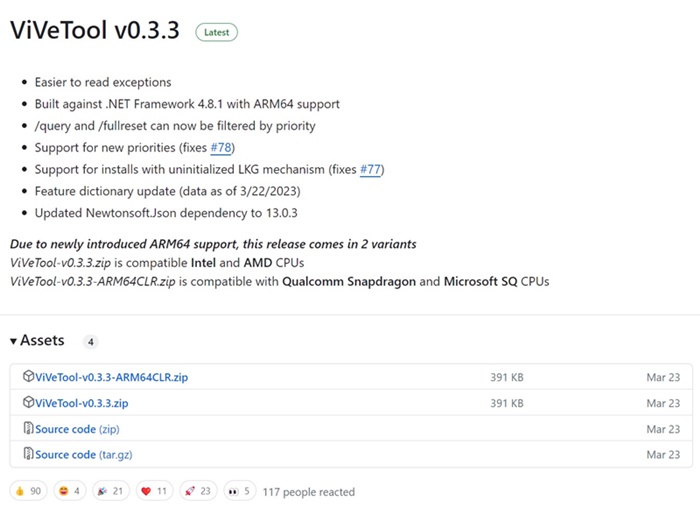
3. Now open your favorite web browser and visit this Github page. Download the latest version of ViveTool on your Windows 10 computer.
4. After downloading the Vivetool, extract the ZIP file.
5. Now open Command Prompt with administrative right (Right click > Run as administrator).
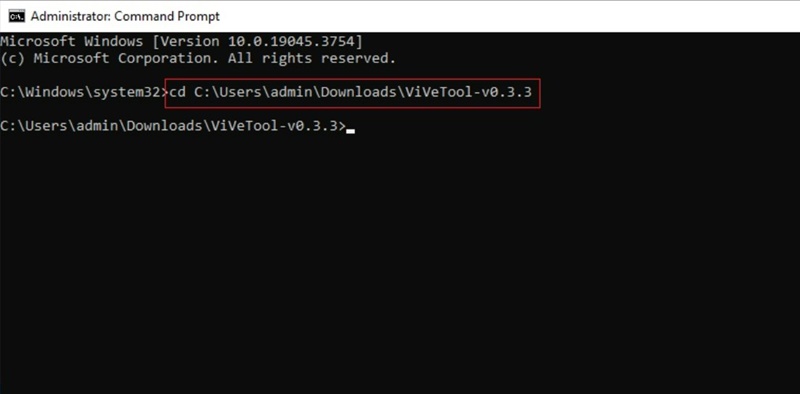
6. Now navigate to the folder with the ViveTool files using the CD Command. For example: cd C:\ViveTool.
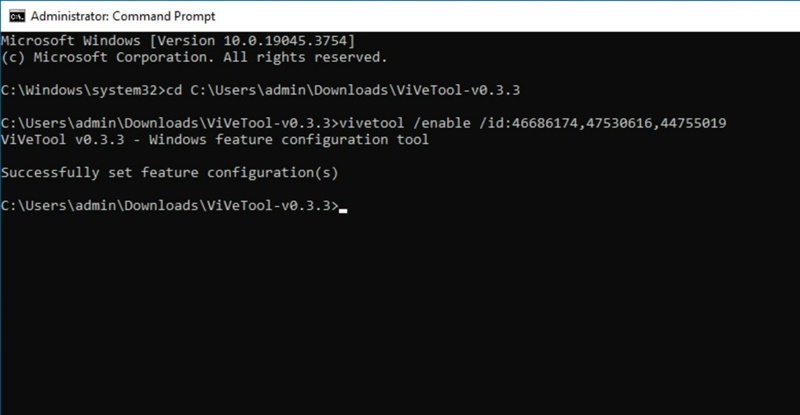
7. Next, execute this command in the Command Prompt and press Enter:
vivetool /enable /id:46686174,47530616,44755019
8. After executing the command, restart your Windows 10 computer.
That’s it! This will enable the Windows Copilot on your Windows 10 computer. After the restart, you should see the Copilot icon in the Taskbar.
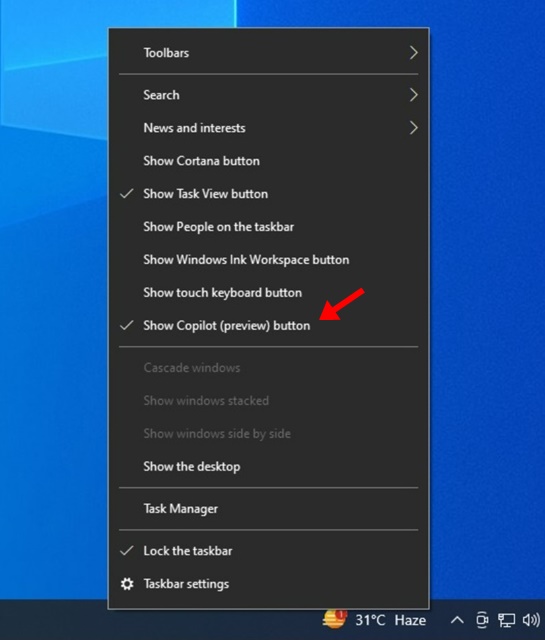
If no icon appears on the Taskbar, right click anywhere on the taskbar and select Show Copilot (Preview) button.
How to Hide Copilot on Windows 10?
If you change your mind and don’t want to use the Windows copilot, you need to make some changes to the Registry to hide the AI button from the Taskbar.
Simply, click on the Windows 10 search and type Registry Editor. Next, open the Registry Editor app and navigate to this path:
HKCU\SOFTWARE\Microsoft\Windows\Shell\Copilot\BingChat\
On the right side, double click on the IsUserEligible key; on the value data field, type 1 and click on the OK button. Make sure to restart your computer to apply the changes.
Availabilty of Copilot in Windows 10
Microsoft has cleared that Copilot will roll out to the devices running on Windows 10 Home & unmanaged Pro editions, version 22H2 in the near term.
So, if your PC is already running on Windows 10 version 22H2, but you are unable to find the Copilot, you will have to wait for few more months. Microsoft has planned to roll out Copilot for Windows 10 in phases using Controlled Feature Rollout (CFR) technology over several months.
So, this guide is all about how to enable Copilot on Windows 10 computer. If you are a Windows 11 user and want to use Copilot, follow our guide: How to Enable Copilot on Windows 11. Let us know if you need more help in enabling Copilot for Windows 10.
