Let’s admit it: macOS is far better, more secure, and more stable than its competitor Windows. The operating system is optimized to provide you with better stability & security options.
While MacOS is far more secure than Windows, there are still many tracking events you would like to prevent. Like every desktop & mobile operating system, you can configure a VPN on Mac to avoid data tracking & hide the IP Address.
How to Install a VPN on Mac
On Mac, multiple ways exist to hide the IP address or get a VPN connection. You can use third-party VPN apps or, configure the VPN settings on your Mac manually, or use a VPN browser extension for Chrome or Firefox.
So, if you are looking for ways to hide your identity online and become anonymous, you can install VPN on MAC. Below, we have shared some simple steps to install VPN on Mac.
How to Install VPN on Mac Manually
The manual method of configuring VPN on Mac is a bit complicated. You must know the VPN server address, the account username, passwords, and the protocol.
If you use any premium VPN services, you will find these details on your VPN web account. Without having these details, you won’t be able to install a VPN on Mac.
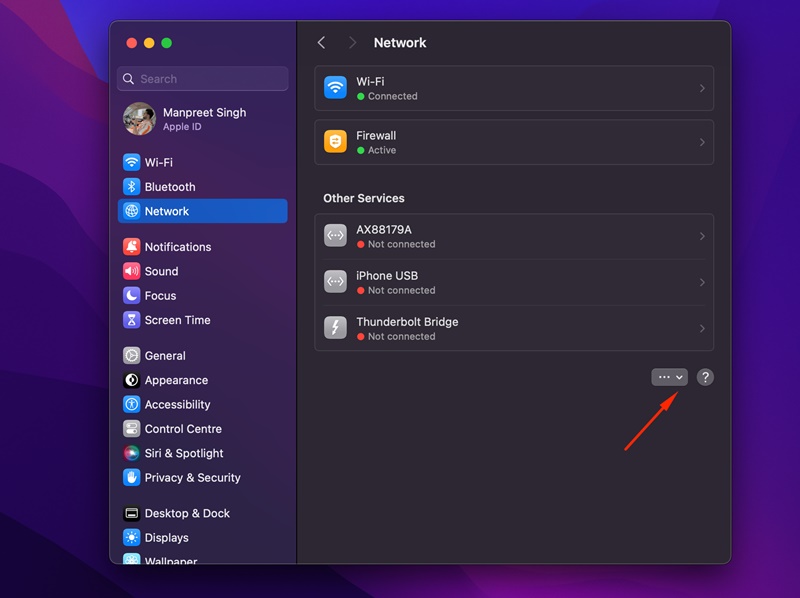
1. To get started, open the Apple Settings.
2. On the Settings, click on the Network icon.
3. On the right side, click on the drop-down icon, as shown in the screenshot below.
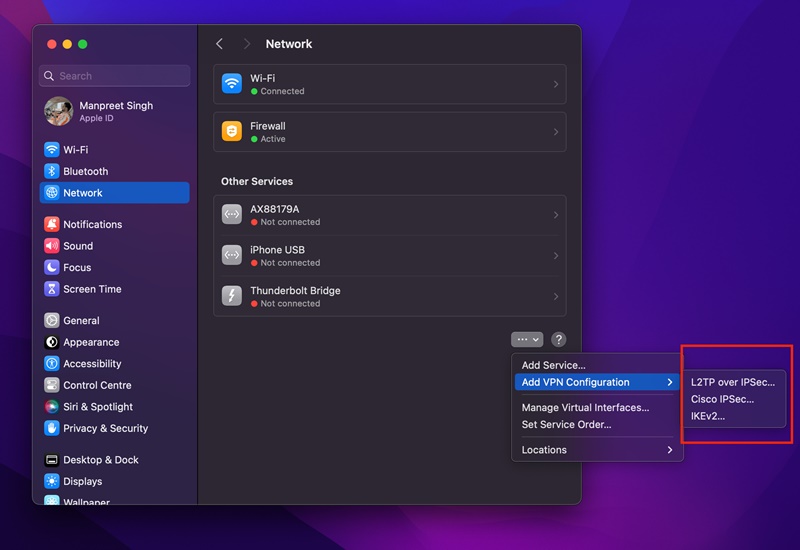
4. On the Menu that appears, select Add VPN Configuration and pick the protocol given by your provider. The protocol could be L2TP over IPSec, IKEv2, or Cisco IPSec.
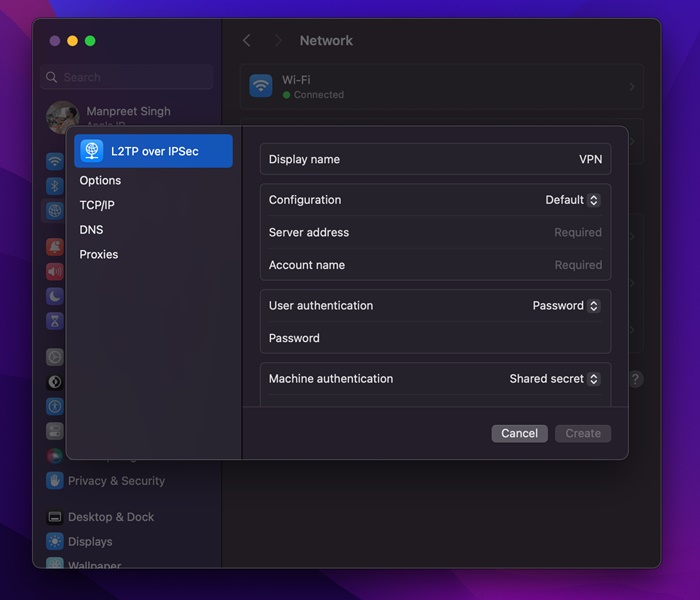
5. Now enter the VPN name, Server address, Account name, Password, and Shared Secret key provided.
6. After filling in all details, click on the Create button. This will create a VPN configuration.
That’s it! After creating a VPN configuration, you can use it on your Mac.
How to Use a VPN app on MacOS?
Well, the steps to connect to a VPN app might vary depending on the app you’re using. However, we have shared the general steps for all major VPN providers below. Let’s get started.
- Visit the official website of the VPN service you want to use.
- Now download & install the VPN App.
- If you’ve downloaded a premium VPN, log in with your account credentials.
- Launch the VPN app, and pick the VPN server of your choice.
- Once done, click on the Connect button.
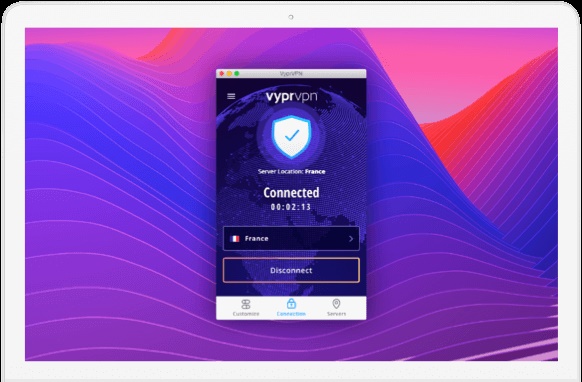
That’s it! Upon successful connection, you will see a connection to the VPN screen. This indicates that the VPN connection is successful and your actual IP Address is hidden.
Best VPNs for Mac
You have many choices when it comes to the best VPNs for Mac. Yes, there are both free & premium VPNs; you need to pick the one that suits your needs.
Usually, premium VPN apps are recommended because they offer better features than free ones. VPN not only hides your IP Address but also blocks many trackers from the web.
On Techviral, we have already shared a list of the best VPNs for Mac. You must go through that post to explore the list of all available options.
Use VPN Extensions for Google Chrome
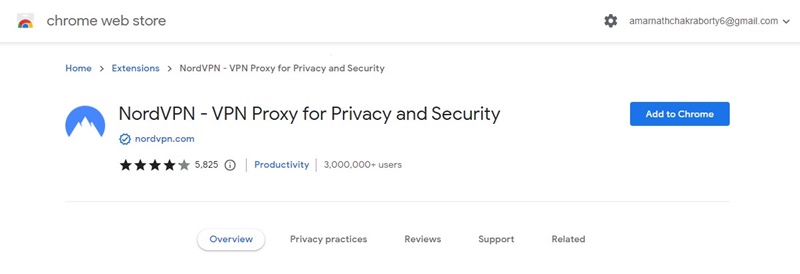
Another best way to avoid trackers & bypass blocked sites is to use VPN for the Google Chrome browser. Hundreds of VPN extensions are made for the Google Chrome browser that lets you bypass blocked sites.
The only problem with extensions is that they work only within the web browser. This means once you close your web browser, the internet activity is no longer protected.
We have already shared a list of best VPN for Google Chrome to access blocked websites. Make sure to go through that post to know all available options.
So, these are some of the best methods to install a VPN on Mac. You should use VPNs to encrypt your real-time internet activity and prevent ISP throttling. Also, VPNs can help you unblock certain sites, including video streaming services.
However, use a trusted VPN app to encrypt your internet traffic. The one with no log policy and a kill switch is usually the best option to get started. Let us know if you need more help installing VPN on Mac.
