Windows 11 is a pretty smart desktop operating system that handles the most complicated things easily. On older versions of Windows, users are required to install the device drivers manually, but the latest Windows 11 can find & install the latest versions of device drivers automatically.
If you have been using Windows 11 for a while, you may know that the operating system automatically detects & installs most drivers during system updates. Also, you can manage the device drivers from the Device Manager.
While Windows 11’s functionality is very helpful, sometimes the update process gets stuck, resulting in missing drivers. If you have just connected a new device to your computer or laptop and Windows 11 has failed to recognize it, it won’t install the required drivers for the proper functioning of the connected devices.
3 Methods to Install Missing Drivers on Windows 11
If so, you must manually find and install the missing drivers on Windows 11. There are two different ways to do this, which we have mentioned below. So, let’s check out how to install missing drivers on a Windows 11.
1) Download & Install Missing Drivers via Windows Updates
One of the easiest ways to install missing drivers on Windows 11 is by utilizing the Windows Update. Follow some simple steps we have shared below to download & install missing drivers on Windows 11 from the Windows Update.
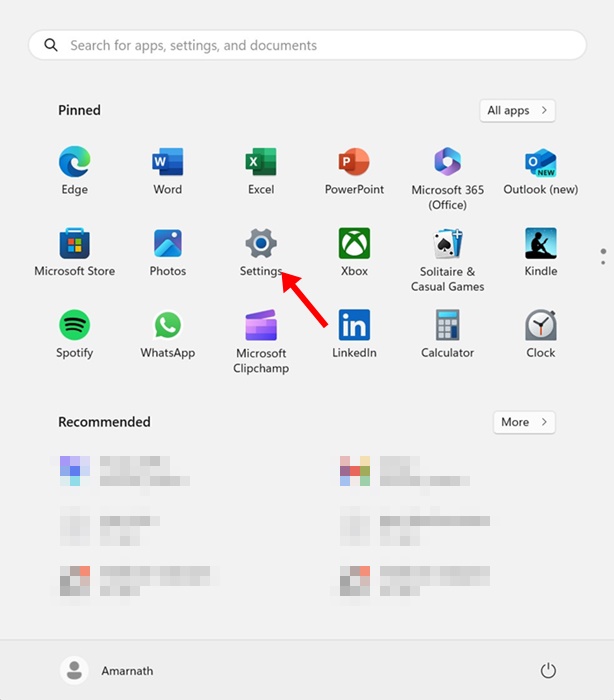
1. Click on the Windows 11 Start button and select Settings.
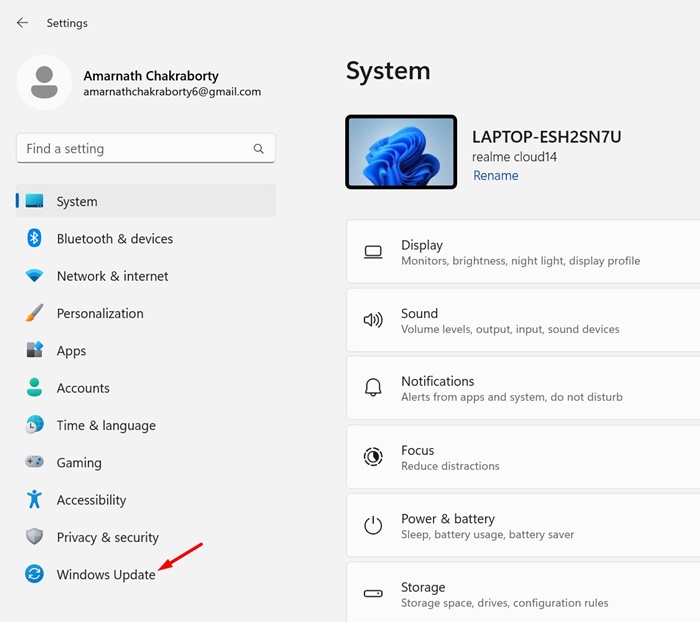
2. When the Settings app opens, switch to the Windows Update tab on the left pane.
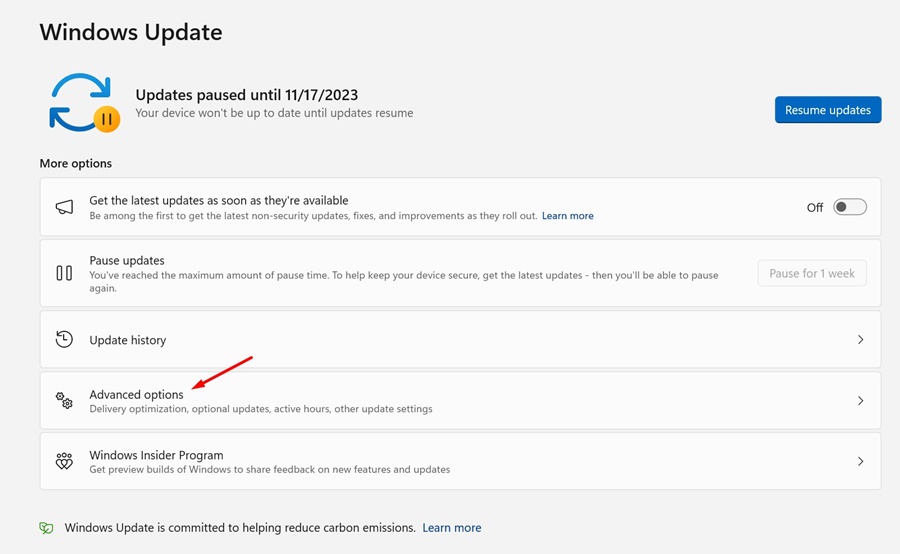
3. On the right side, click on the Advanced Options.
4. Scroll down to the Additional options and click on Optional Updates.
5. If a driver update is available, the update will appear under the Driver Updates.
6. Simply click the Download & install button to install the missing driver.
That’s it! That’s how easy it is to install missing drivers on Windows 11 via Windows Updates.
2) Install Missing Drivers on Windows 11 via Device Manager
As we know, Device Manager is the ultimate solution for all device driver needs. From the Device Manager, you can easily install/uninstall existing drivers, roll back drivers to the previous version, or uninstall a device.
The Device Manager of Windows 11 can also install the missing drivers. To do that, follow the steps we have shared below.
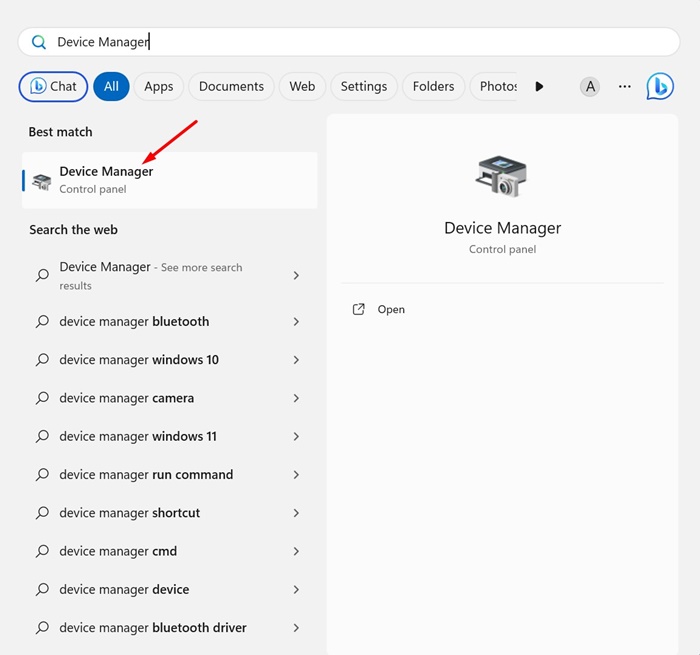
1. Type in Device Manager on the Windows 11 search. Next, open the Device Manager app from the list of best match results.
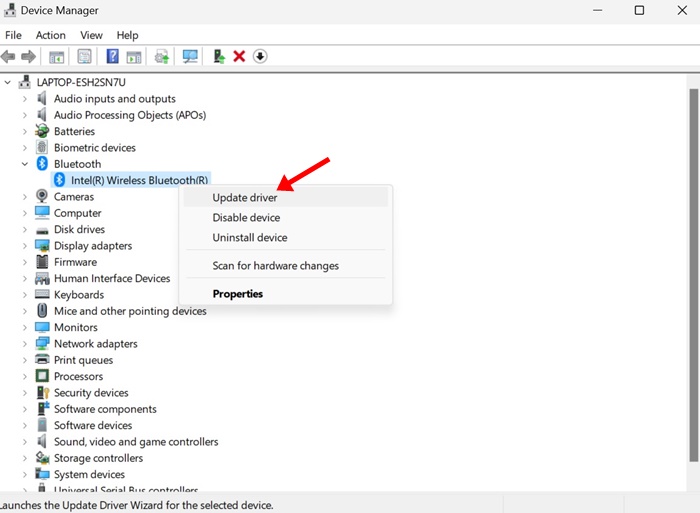
2. When the Device Manager opens, right-click on the device whose driver is missing.
3. On the context menu, select the Update driver option.
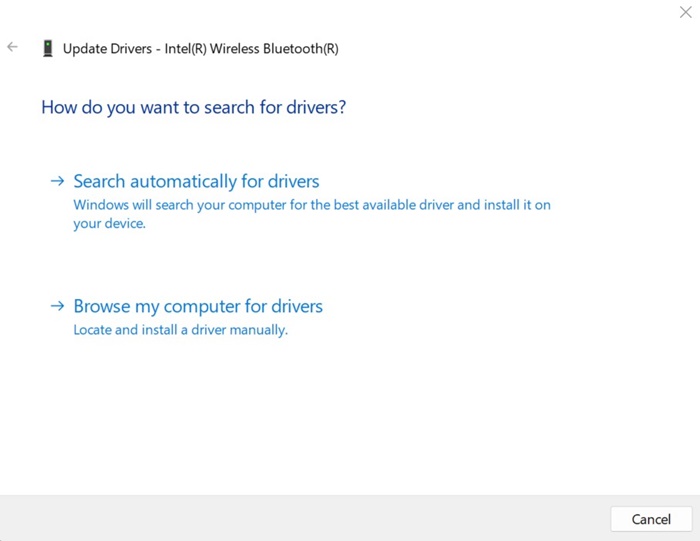
4. On the How do you want to search for drivers? Prompt, select Search automatically for drivers. If you already have the missing driver, select the Browse My Computer for drivers option.
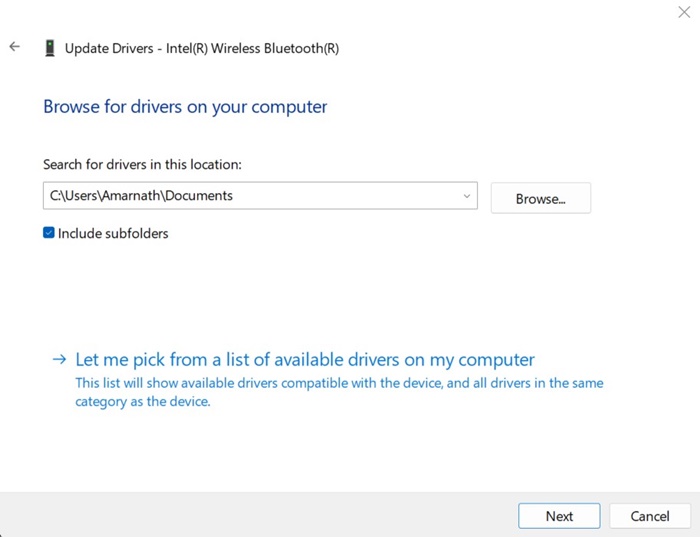
5. If you have selected the second option, you will be asked to select the drive containing the missing driver. Simply locate the folder and click on Next.
6. Now, follow the on-screen instructions to install the missing device driver on Windows 11.
That’s it! This is how you can install missing drivers on Windows 11 via the Device Manager utility.
3) Use Third Party Driver Updater Tools
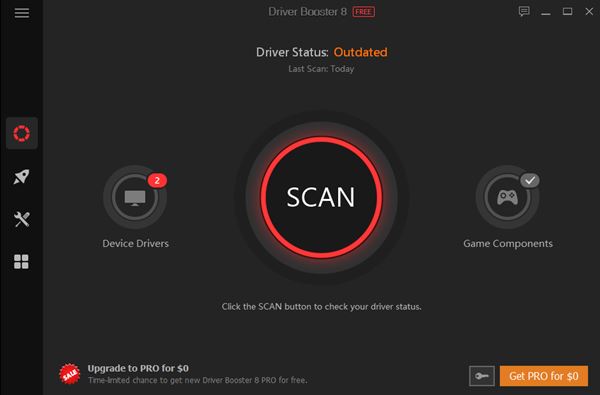
The remaining option to install all missing drivers on Windows 11 is to use third-party driver updater tools. Driver updater tools compatible with Windows 10 runs fine on the latest Windows 11.
There are hundreds of driver updater tools for Windows available on the web. Almost all tools can be downloaded & used for free, but make sure to download the installer file from trusted sources.
On Techviral, we have already shared a list of best driver updaters for Windows. You can check out that list to discover all available options.
So, these are the best ways to install missing drivers on Windows 11. Using these three methods, you will be able to find and install all missing drivers that are crucial for the proper functioning of your device. If you know of any other method, let us know in the comments below.
